Adding a New Hard Disk to Ubuntu (20.04) VM in VirtualBox

We will explain how to create, attach, and use disks in the Ubuntu(20.04) VM of Oracle VM VirtualBox.
A rough outline of the procedure is as follows.
- Create a virtual hard disk in Virtual Box Manager and attach it to the Ubuntu VM
- Initialize and format disk devices attached on the Ubuntu GUI interface
- Make the disk device available every time Ubuntu boots up.
1. Create a disk image and attach it to an Ubuntu VM
Disk images can be created through Virtual Media Manager in the Virtual Box manager.
I plan to create an image of 55GB, and there are two options for creating a disk image. The first is an option to occupy the capacity of my hard disk as much as I have used, and the second is to create an option to occupy the capacity planned from the beginning all at once. However, for stable operation, I will create 55GB at a time with the second option.
I created a virtual hard disk with Pre-allocate Full Size option.
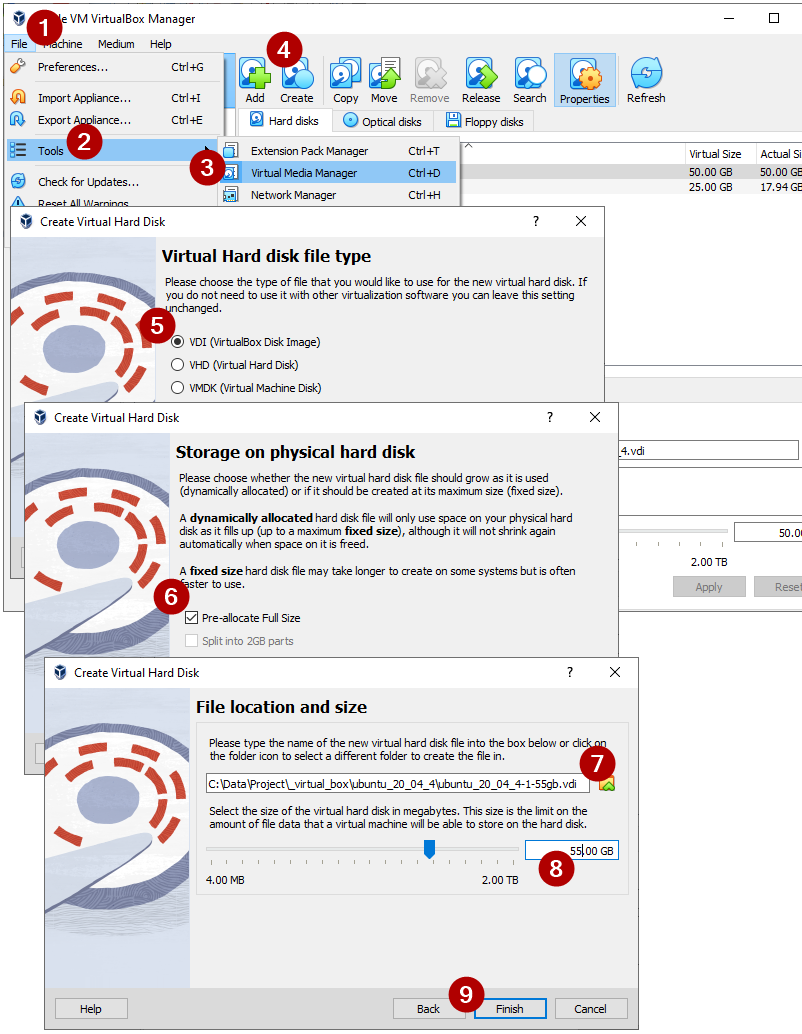 Oracle VM VirtualBox Manager - Create Virtual Hard Disk
When you finish creating the virtual disk image, you can check the created disk in the hard disk list after the virtual disk image initialization time has passed.
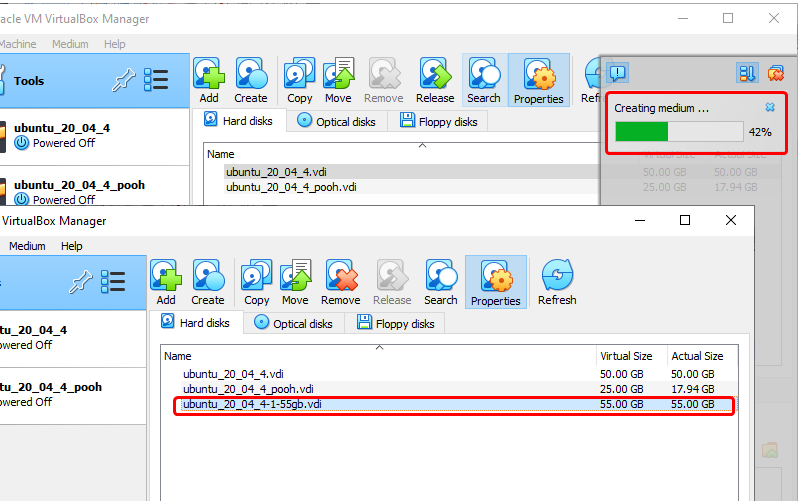 Oracle VM VirtualBox Manager - Virtual hard disk initialization in progress
Now we will add the created virtual hard disk to the Ubuntu VM.
You can add a hard disk using a SATA controller in the Storage tab of Ubuntu VM settings.
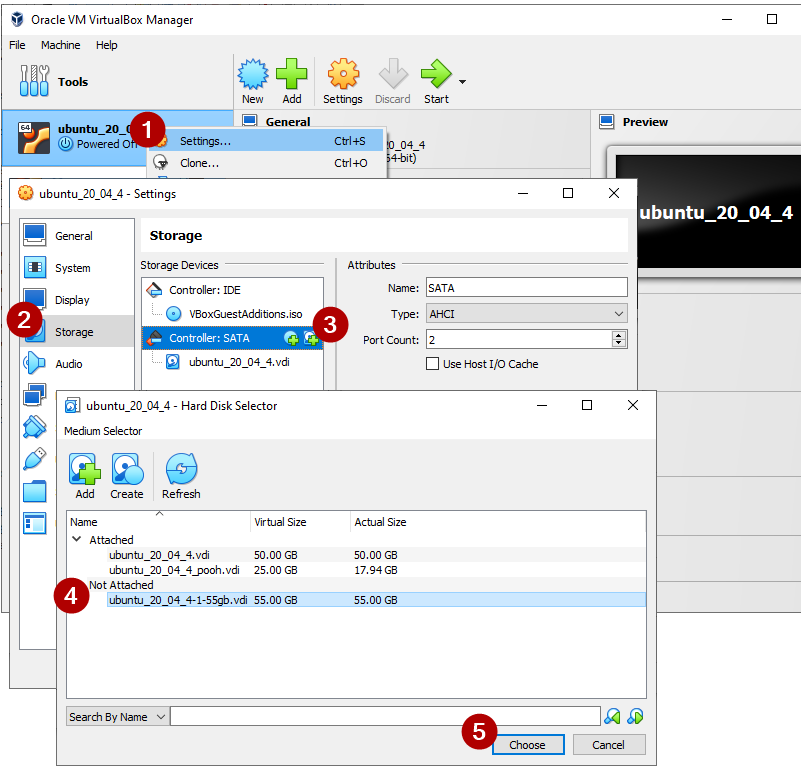 Oracle VM VirtualBox Manager - Add hard disk to Ubuntu VM
When you select the hard disk you created, you can check that the hard disk is attached in the information section.
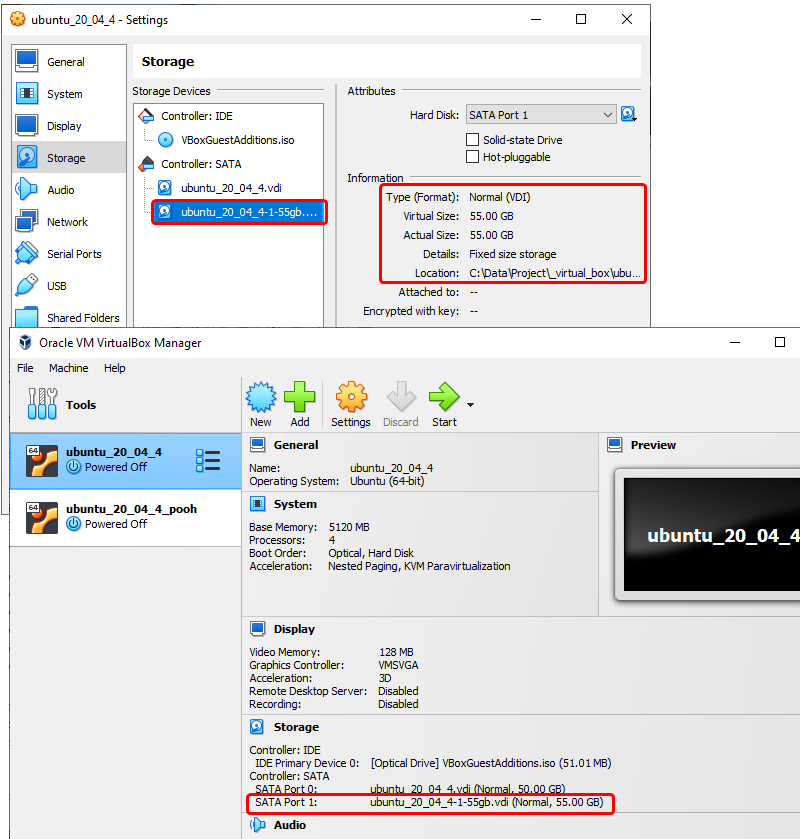 Oracle VM VirtualBox Manager - Check hard disks added to Ubuntu VM
2. Disk initialization in a Ubuntu VM
From a Virtual Machine perspective, the hard disk is physically attached to the Ubuntu VM.
Now we are going to format the disk in the Ubuntu VM. We can do this using the classic fdisk, but we will proceed with a more intuitive GUI tool called Gparted.
Let’s install and run gparted using apt.
1
2
3
4
# install gparted
sudo apt-get install gparted
# run gparted
gparted
After selecting the hard disk created in the upper right corner of GParted, we will create an msdos partition table and format it as ext4 according to the picture below.
Apply the partition msdos partition table through the menu.
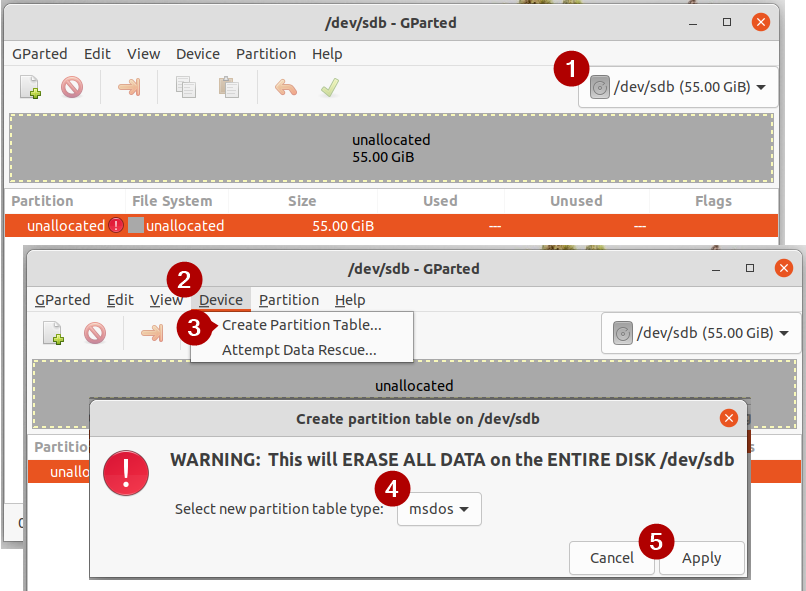 Ubuntu VM - GParted - create partition table in msdos format
Then, we will create a partition. Right-click on the unallocated partition and create an ext4 file system partition. I set it to full size.
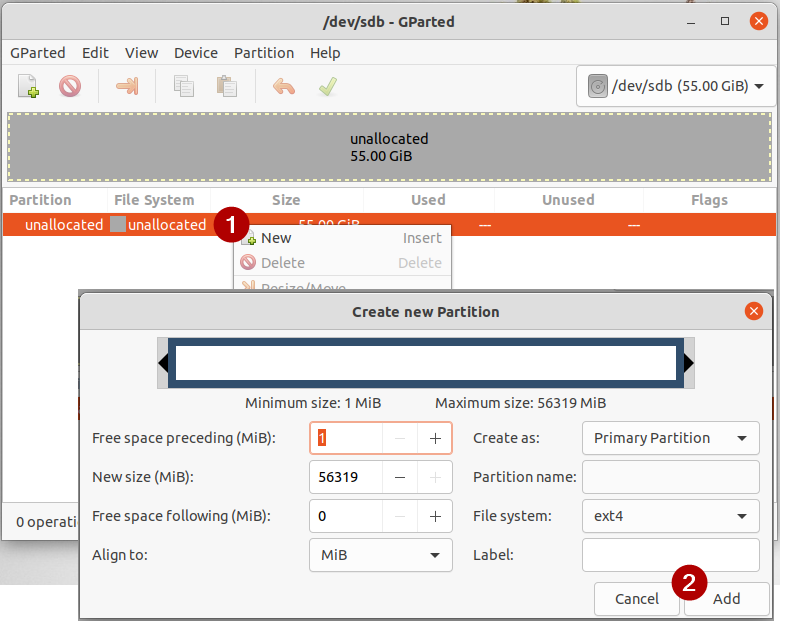 Ubuntu VM - GParted - Create partition with ext4 file system
Format the partition of the ext4 file system to etx4.
Then click the green checkbox to apply the settings made so far.
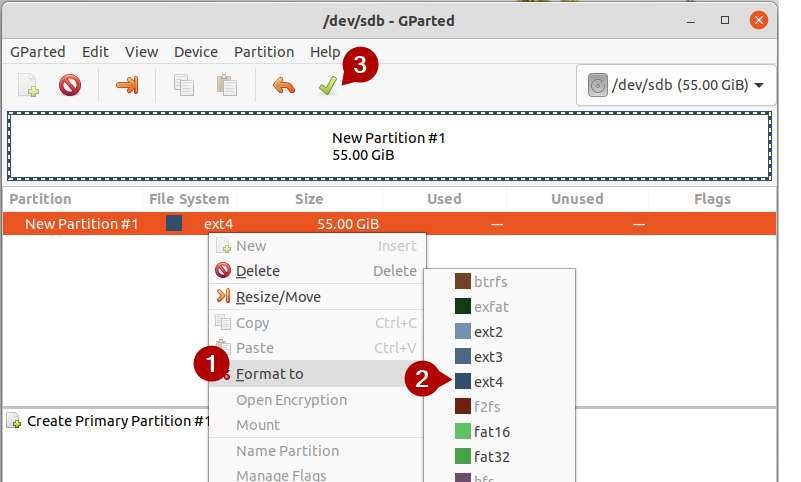 Ubuntu VM - GParted - Format partition to ext4
Hard disk initialization is now complete. To mount a hard disk so that it can be used every time the Ubuntu VM boots up, unique disk ID information is needed. Right-click the created partition, check the UUID in the information menu, and remember it.
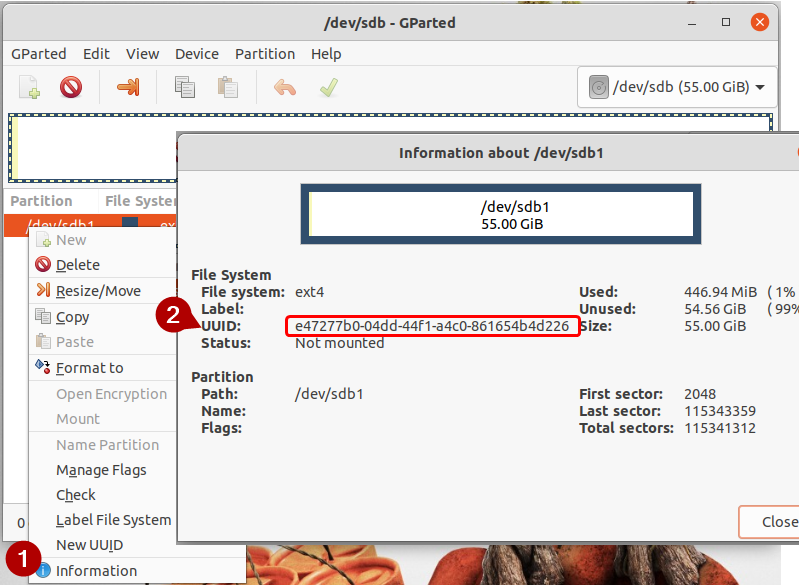 Ubuntu VM - GParted - Check UUID of disk partition
3. Every bootup, mount the disk
In the current state, the formatted disk device is ready, but there is no path through which files can be written. So, we will create a path by connecting my specific folder to the hard disk device. This is mount.
The UUID identified in gparted above represents the hard disk device, and we will connect this device to the /mnt/data folder to create a path through which files can be written. Since the disk needs to be available every time Ubuntu boots up, we will describe this in /etc/fstab.
The line below will be added to /etc/fstab.
1
2
# UUID=<hard disk device UUID> <folder where the device will be mounted> ext4    defaults          0       0
UUID=e47277b0-04dd-44f1-a4c0-861654b4d226 /mnt/data       ext4    defaults          0       0
Then, we will create a symbolic link from the mounted /mnt/data to the data folder in the home directory.
The detailed procedure is as follows, and if you have completed all steps, reboot.
1
2
3
4
5
6
7
8
9
10
11
12
13
14
15
16
17
18
19
$ mkdir -p /mnt/data
$ sudo chown -R ${USER}:users /mnt/data
$ cd ~/
$ sudo ln -s /mnt/data data
$ sudo vi /etc/fstab
#-----------------------------------------------------------------------------
# /etc/fstab: static file system information.
#
# Use 'blkid' to print the universally unique identifier for a
# device; this may be used with UUID= as a more robust way to name devices
# that works even if disks are added and removed. See fstab(5).
#
# <file system> <mount point>   <type>  <options>       <dump>  <pass>
# / was on /dev/sda5 during installation
UUID=76a80216-1031-4871-945c-4c8de2845136 /               ext4    errors=remount-ro 0       1
UUID=e47277b0-04dd-44f1-a4c0-861654b4d226 /mnt/data       ext4    defaults          0       0
# /boot/efi was on /dev/sda1 during installation
UUID=A4B5-D201  /boot/efi       vfat    umask=0077      0       1
/swapfile                                 none            swap    sw              0       0