Lenovo Ideapad Slim3 15ABA7 R5 Windows installation, memory upgrade
Lenovo Slim3 15ABA7 R5has Free DOS installed as the default OS, so Windows must be installed separately.
Let’s look at the basics for installing Windows and how to upgrade memory.
spec
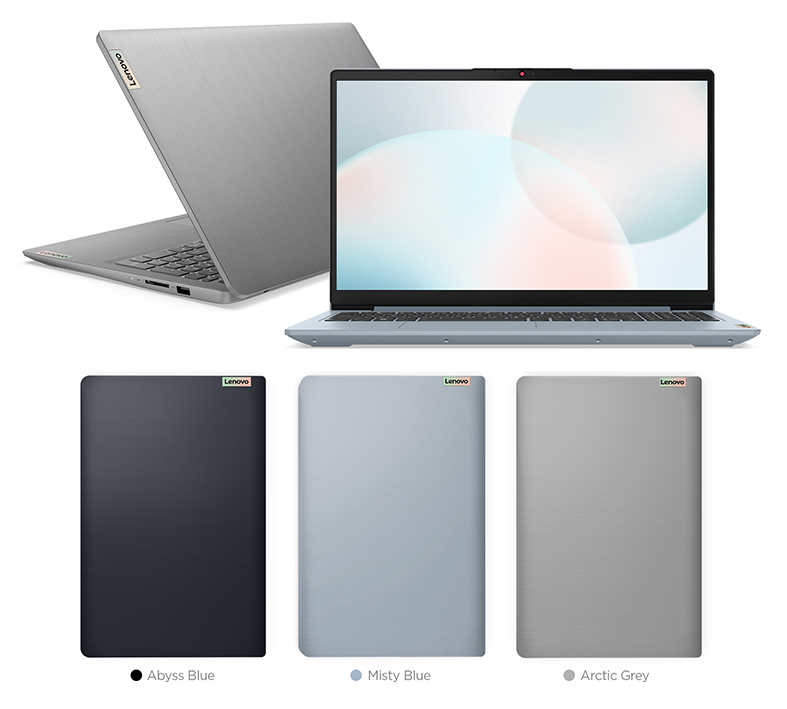 Lenovo Slim3 15ABA7 R5
Lenovo Slim3 15ABA7 R5is equipped with the 5625U model of Ryzen 5 4th generation (Cezanne) as the CPU. In short, since it is a cost-effective laptop, it has built-in graphics that share the GPU included in the CPU.
Although the price is relatively cheap, it is a cost-effective laptop with usable performance, but its advantage lies in the expandability of the memory and hard disk.
- Storage device: NVMe M.2 SSD 256GB installed as standard + 1 additional 2.5-inch SATA hard disk slot
- Memory: 8GB onboard (DDR4-3200) + 1 additional socket
One SATA hard disk and one DDR4 memory can be additionally upgraded.
Preparing a Windows USB stick
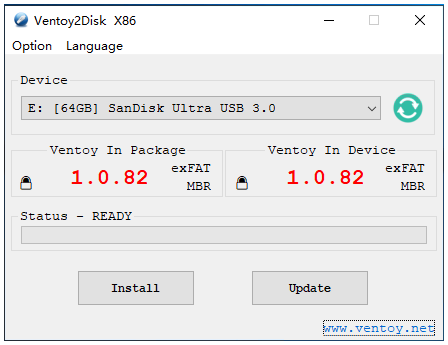 Ventoy - www.ventoy.net - A New Bootable USB Solution
Generally, to install Windows, it is common to burn a bootable Windows image onto a USB stick and install it. However, we will use a program called Ventoy.
If you burn the Ventoy software to a USB stick, Windows will recognize it as a removable disk. Then, if you copy the downloaded Windows ISO file and start the computer, you can select the ISO file saved on the USB stick and boot. This has the advantage of allowing you to selectively boot and install by copying several ISO files to a single USB stick.
- How to install Ventoy on a USB stick: https://www.ventoy.net/en/doc_start.html
The Lenovo driver site supports system drivers for Windows 10 and Windows 11, but I installed Windows 11.
Prepare a USB stick with the Windows ISO file copied to the Ventoy base.
And, on the Lenovo driver site, Wireless LAN driver Download and save it to a USB stick.
In the case of Windows 11 installation, the Windows ISO image does not include a wireless LAN driver, so initial Windows setup via the Internet cannot be performed later. So, you need to prepare a wireless LAN driver in advance.
BIOS setup and Windows installation
Open the display of Lenovo Slim3 15ABA7 R5. The laptop will automatically turn on. Press ‘F2’ repeatedly to enter the BIOS setup screen.
When booting with Ventoy, an error related to Securiy Verification occurs. To prevent this, change Secure Boot to Disable in the Security menu. Insert the USB stick into the laptop, save the BIOS settings and exit.
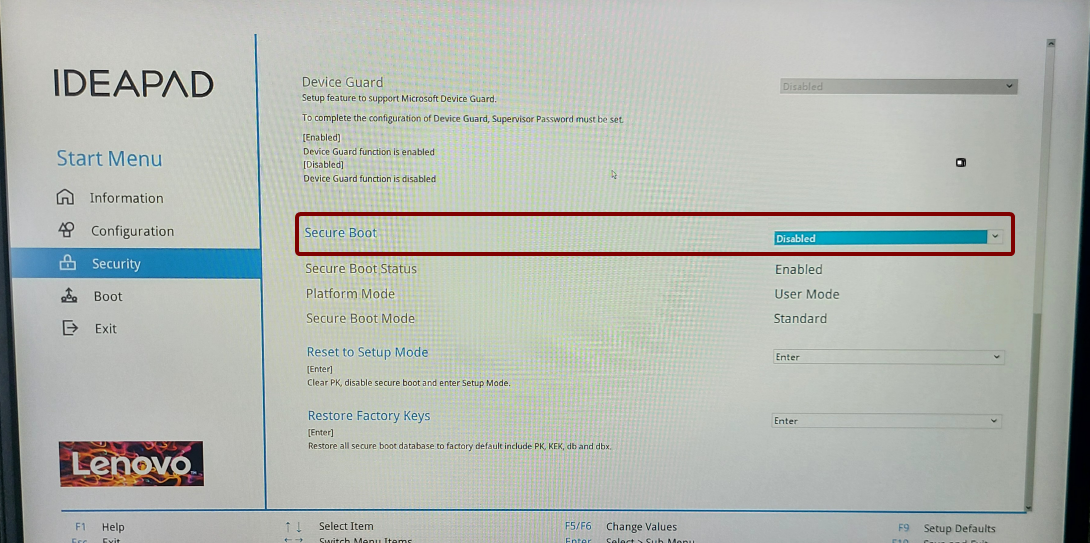 BIOS > Security > Secure Boot > Disabled
Disable auto power on when laptop display is opened
Lenovo probably thought that automatically turning on the laptop display when opened was good for user convenience.
If you do not like this feature, you can change theFlip to Bootfeature in theConfigurationmenu in BIOS toDisabled.
Select the Windows ISO from the Ventory boot menu and install Windows.
Lenovo Slim3 15ABA7 R5does not automatically install the wireless LAN driver when installing Windows 11. Therefore, it is no longer possible to proceed at the ‘network connection’ setup stage.
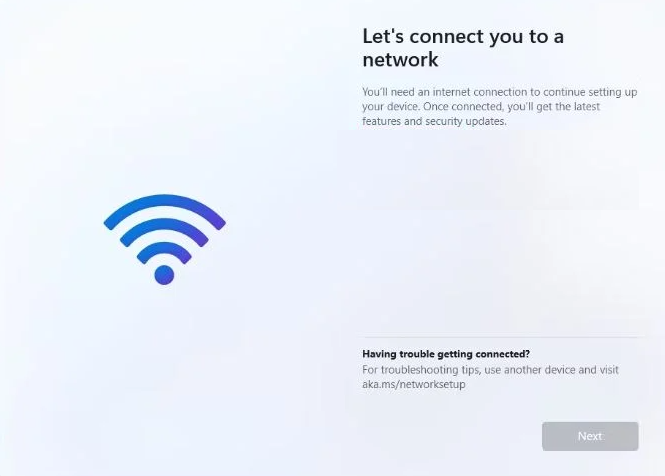 Windows 11 installation - Cannot proceed with ‘Network Connection’ settings
On that screen, press Shift + F10 to open a Command Prompt window. Then enter OOBE\BYPASSNRO.
Afterwards, it will automatically reboot, and you can skip the ‘network connection’ settings afterwards.
1
OOBE\BYPASSNRO
Once Windows installation is complete, install the wireless LAN driver saved on the USB stick. Then, visit Lenovo driver site and install the remaining drivers that could not be installed. do.
memory purchase
As shown below, Lenovo Slim3 15ABA7 R5is equipped with 8GB of DDR4-3200 memory onboard. Therefore, to create a dual-channel memory configuration, purchase 8GB of DDR4-3200 clock memory.
- Memory: 8GB onboard (DDR4-3200) + 1 additional socket
If there is memory in the shopping mall with a clock marked as DDR4-3200 or PC4-25600, you can purchase it.
Install memory upgrade
Place the laptop face down on a soft cloth and unscrew all the screws on the back.
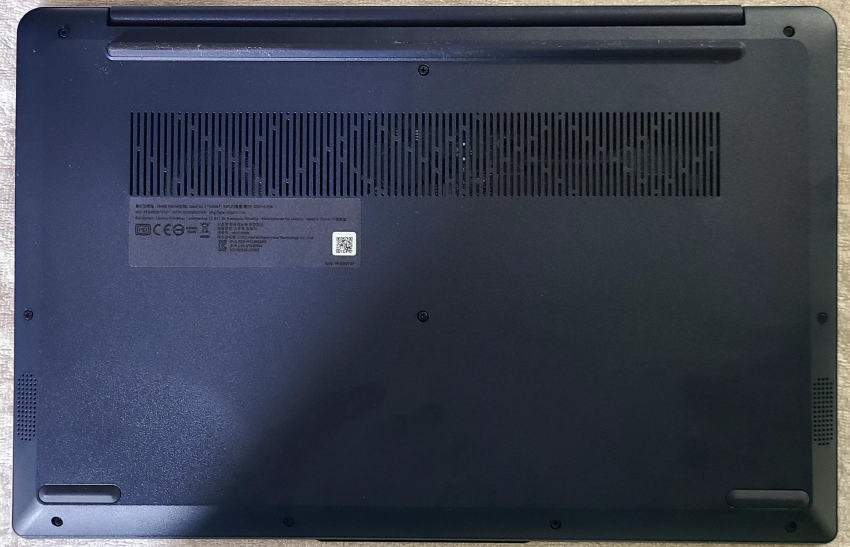 Lenovo Slim3 15ABA7 R5 - Rear - Remove screws
Then, insert an unused plastic card into the gap in the upper right corner to open the back panel. Then, open the back panel by turning it little by little, as if opening a can of canned food. If you insert the plastic card too deeply, the laptop board may be damaged, so insert only a little.
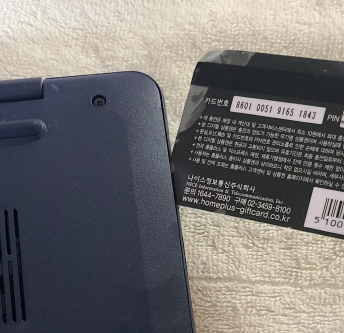 Lenovo Slim3 15ABA7 R5 - Opening the back panel
As explained above, one SATA hard disk and one DDR4 memory can be additionally upgraded.
 Lenovo Slim3 15ABA7 R5 - Inside
Unlike other laptops, Lenovo Slim3 15ABA7 R5has a memory slot cover. Remove a small amount of the sticker attached to the cover and lift the cover upward to remove it.
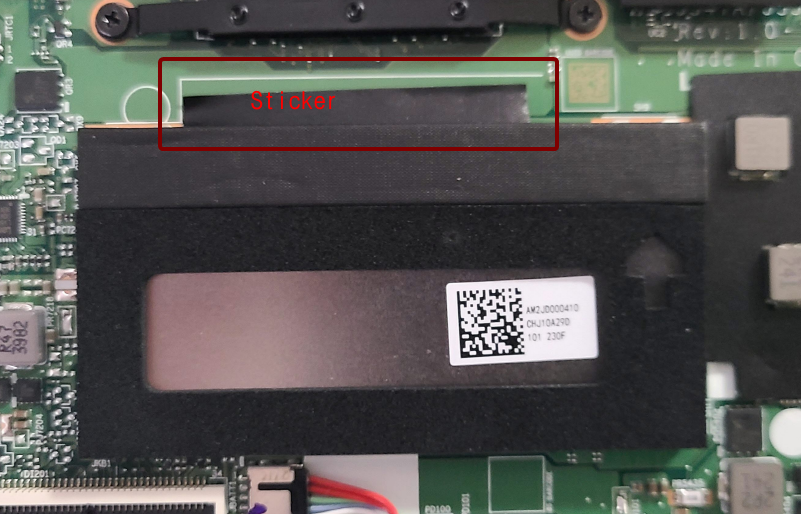 Lenovo Slim3 15ABA7 R5 - Internal - Removing the sticker on the memory cover
If you have installed the memory, reinstall the memory cover and attach a sticker.
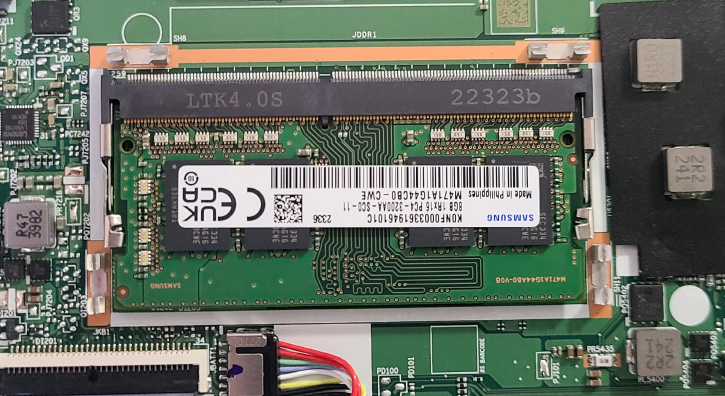 Lenovo Slim3 15ABA7 R5 - Internal - Memory installed
And before closing the back panel, make sure the laptop turns on and boots properly. If booting does not occur due to poor memory contact, the back panel must be opened again, so check whether the boot is normal without closing the back panel.
Place something like a cigarette case on the hinge of the laptop to prevent the fan from spinning, then turn on the laptop. If the memory is not recognized properly or does not boot, try extracting the memory and reinstalling it.
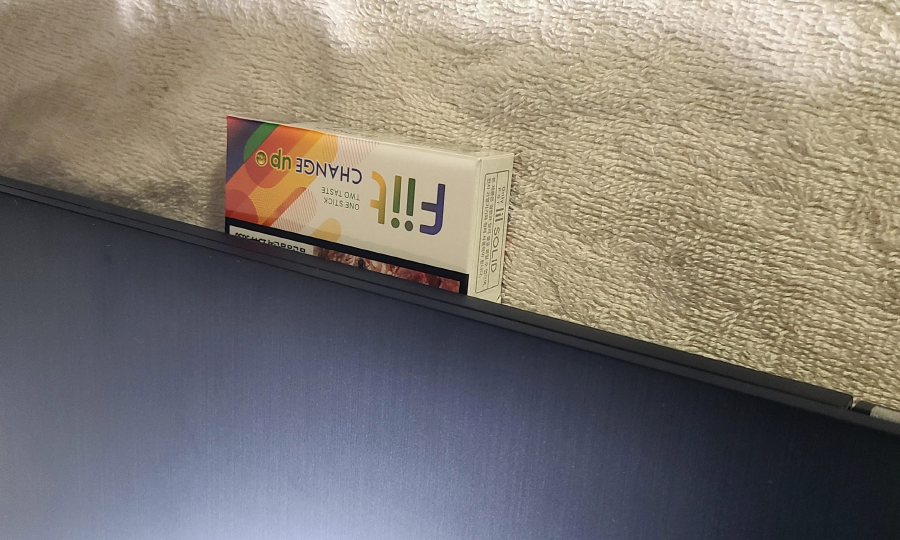 Lenovo Slim3 15ABA7 R5 - Secure bottom space to check new memory operation
If the laptop operates normally, close the back panel and retighten the screws that were loosened.
Check memory dual channel recognition
Install CPU-Z or HWiNFO64 or download the portable version. .
In CPU-Z, if the memory operates as Dual Channel, Channel is usually displayed as Dual, Lenovo Slim3 15ABA7 R5is displayed as 2 x 64-bit.
I`m not sure if this is an error or a difference in the latest version of CPU-Z.
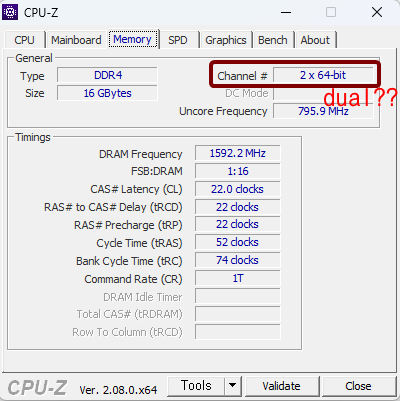 Lenovo Slim3 15ABA7 R5 - CPU-Z - Memory
However, in HWiNFO64, it was displayed correctly as Dual-Channel.
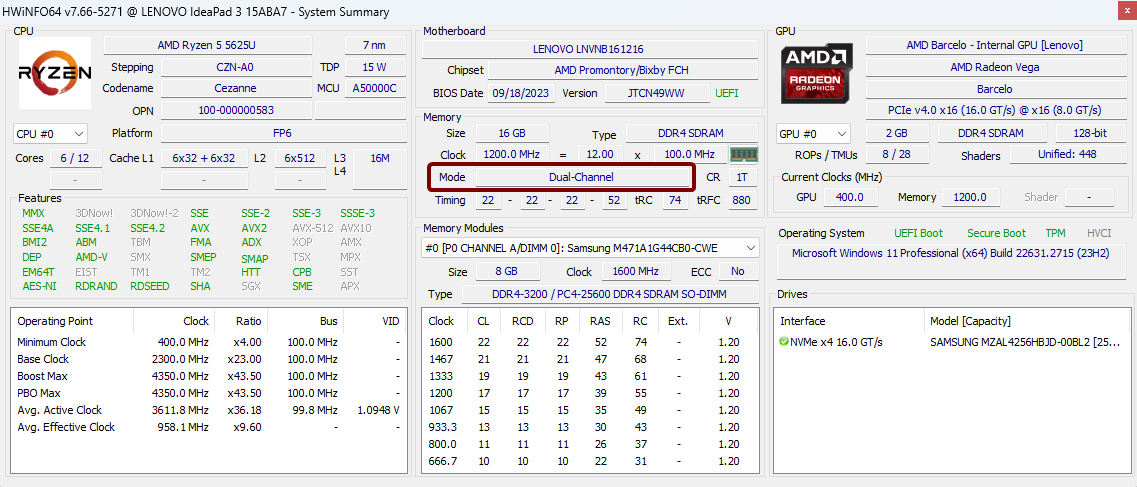 Lenovo Slim3 15ABA7 R5 - HWiNFO64 - System Summary - Memory