Obsidian Image Block - captions, resizing, plugins
If you’re reading this, I don’t think you’re reading because you don’t know how to paste and add image files to Obsidian. I think you’re probably reading this wondering how to manage image files well, since Obsidian, unlike typical web-based blogs, creates/saved image files that must be managed by the writer.
Image Management – Do you like my approach?
In fact, there are several ways to manage image files in Obsidian, depending on which community plugins you use in combination.
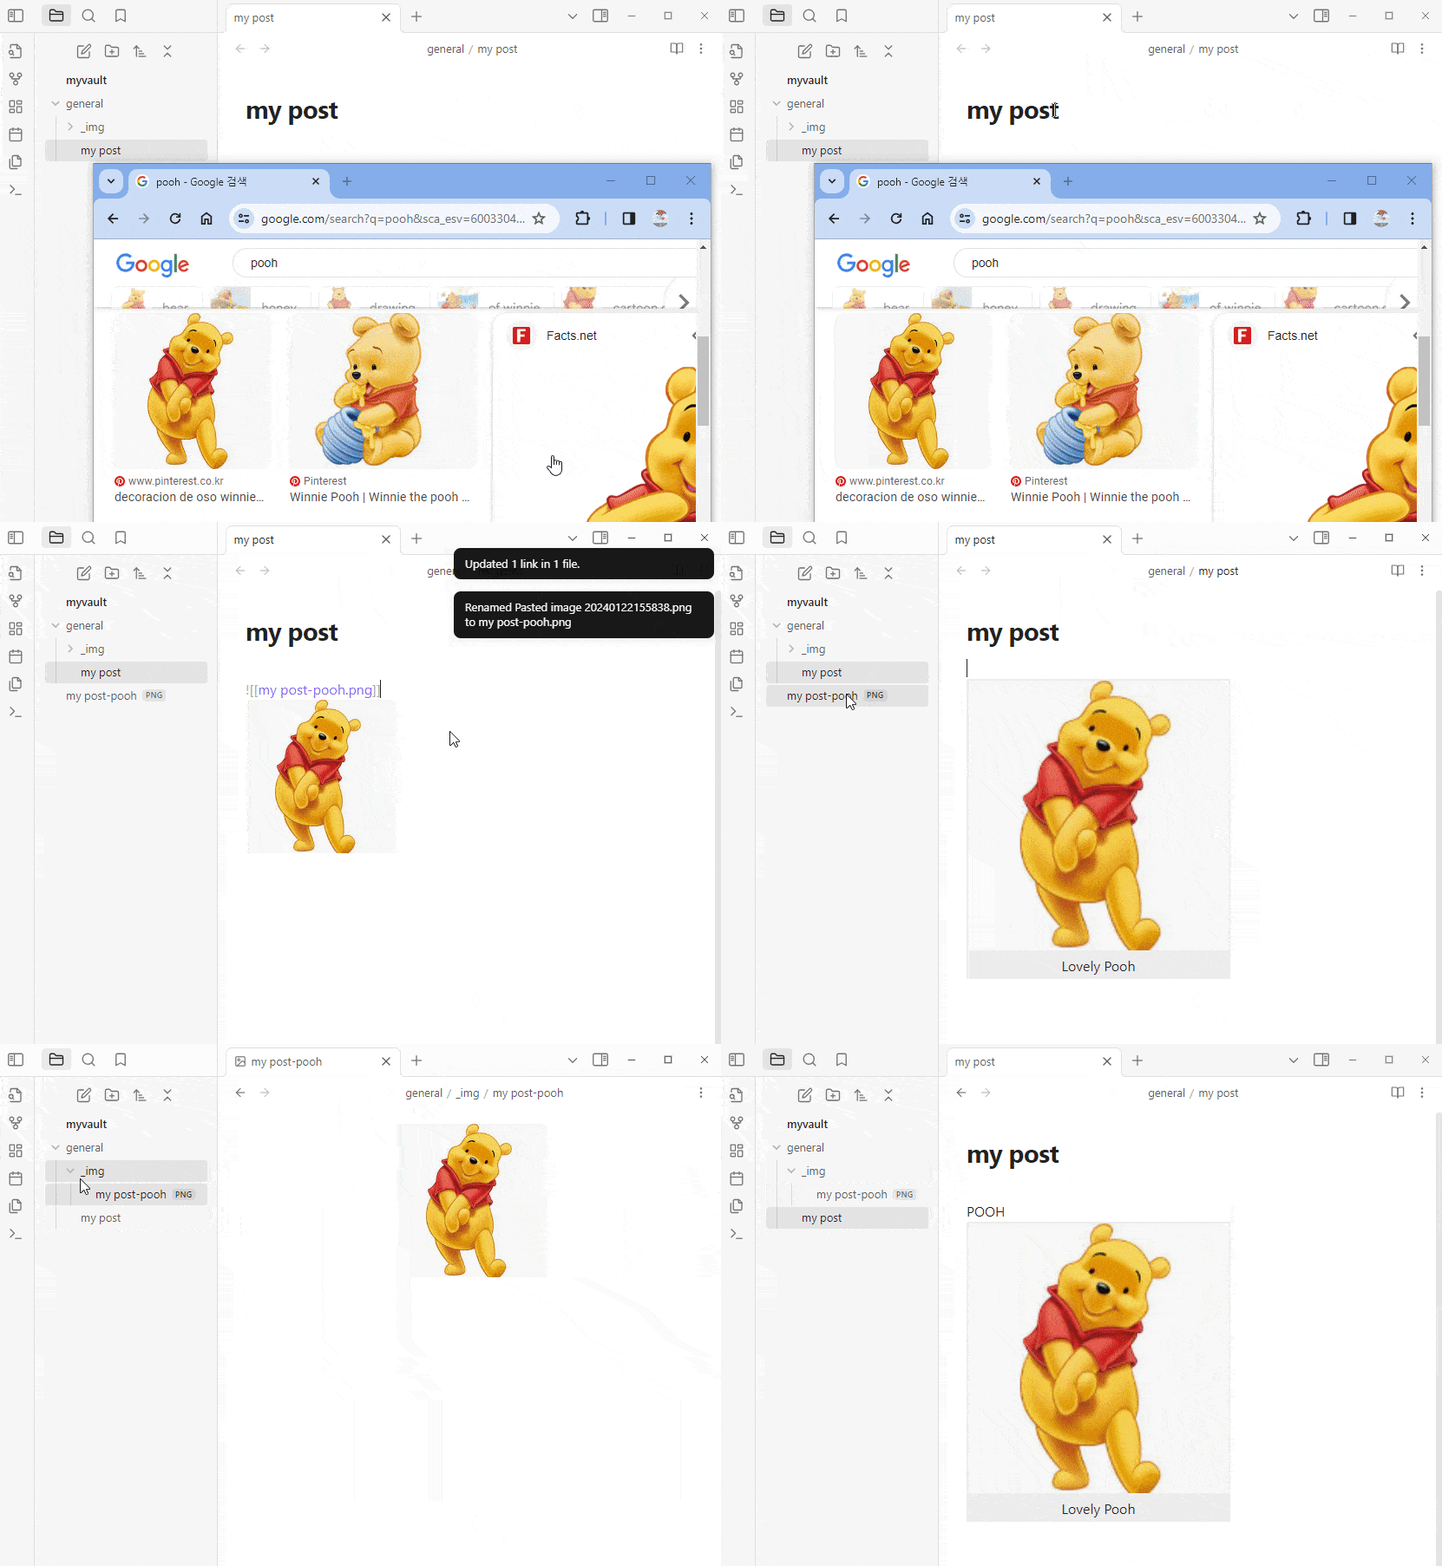 Image Management – Do you like my approach?
How to manage my image files is as follows.
Use the
Win + Shift + Sshortcut keys to select and capture the desired part (save it to the clipboard)Then, use the
Ctrl + Vshortcut key to paste it into Obsidian NoteThen choose a name for the newly created image file. The image file is saved in the path where the current note file is saved.
Write a caption and appropriate size for the image
Then, move the image file to the
_imgfolder in the path where the current note is saved
If you like my approach to managing images, you’ll need to do a little Obsidian setup and install two community plugins. Shall we go?
Basics of image blocks
If you surround the file name with two square brackets starting with an exclamation point, it will be displayed as an image in Obsidian.
1
![[myimage.png]]
There are two ways to add images to Obsidian notes.
- Just drag and drop the image file from the file tree window on the left side of Obsidian to the note with the mouse
- Use a capture program or graphics tool to copy the image to the clipboard (Ctrl + C) and then paste it into Obsidian Note. (Ctrl + V)
In fact, it seems to make sense to add the absolute path of the image file to the image block, but when you add an image block through mouse drag and drop or paste, only the file name is added to the syntax. Perhaps the absolute path and symbols of the image file are managed by Obsidian’s internal database.
Without additional community plugins, you can adjust the image size by adding the OR character and the image width to the right of the file name using Obsidian syntax.
1
![[myimage.png.png|300]]
However, if you want to add captions to images, you will need to install an additional community plugin
 Change image size using Obsidian basic syntax
Obsidian Settings
This setting is related to the location where the image file is created when the image is copied to the clipboard and then pasted into Obsidian Note. This setting is applied when pasting not only image files but also various types of attachments.
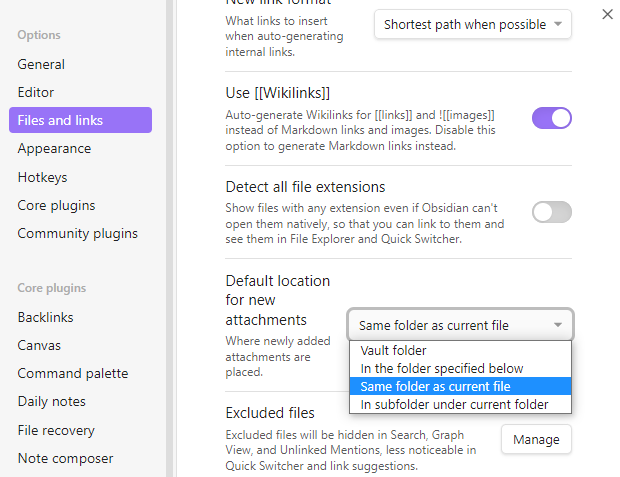 Obsidian - Settings - Files and links - Default location for new attachments - Select
 Same folder as current file
By setting Same folder as current file, an image file is created in the location where the note is located, and when all image files for the note are prepared, it is recommended to manually move the file to the _img folder. This is because there is no guarantee that all images pasted will be valid until the note is completed.
Community plugins
To use the method I showed above for managing image files, you will need to install two community plugins.
Paste image rename
The Paste image rename plugin allows you to rename an image file by pasting the image with the Ctrl + V shortcut.
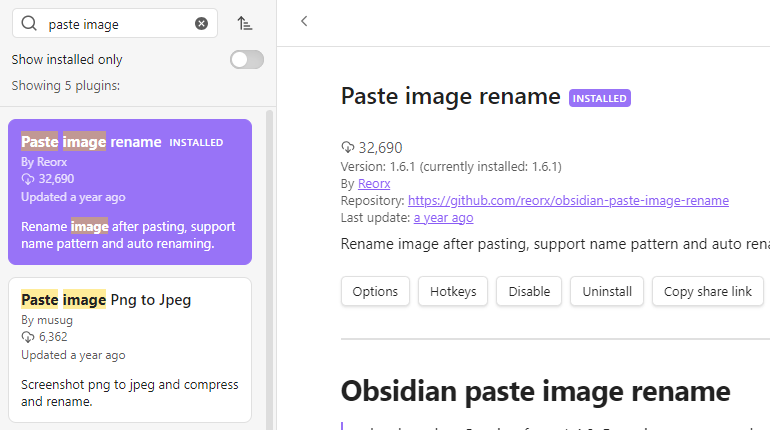 Obsidian - Community Plugins - Paste image rename
When you paste, a pop-up opens. The name of the note is automatically entered as the file name, and you can add the name of the image file as a suffix.
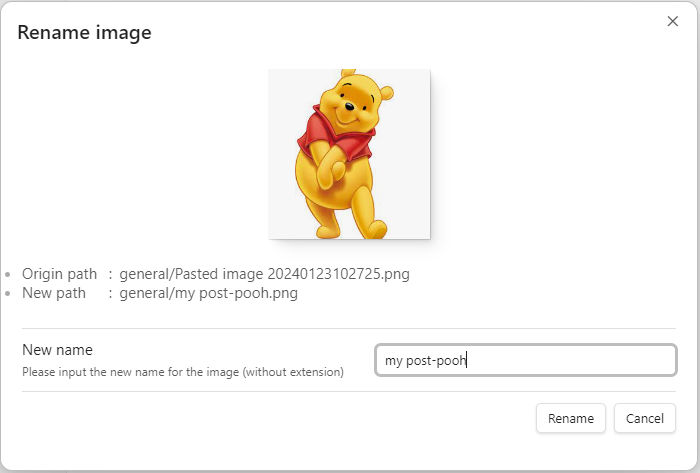 When you install
 Paste image rename and paste the image with Ctrl + V, the file name modification pop-up opens.
This helps you sort by file name and distinguish which image file is dependent on which post when there are multiple images attached to a note. Below is a case in which the image files attached to this article are automatically sorted.
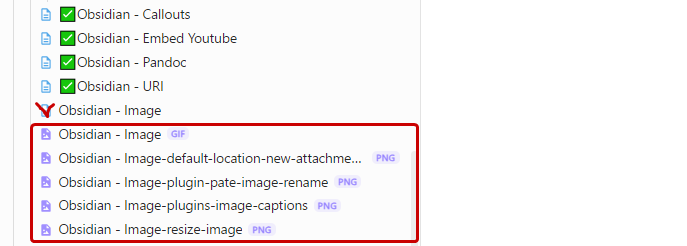 Automatic sorting of image files by Obsidian file name
Image Captions
If you search for image caption in the community plugin menu, you can see the top two image caption plugins ranked by downloads. The two plugins are similar in usage. The first plugin provides more options for image resizing, but in my case, I didn’t need any complicated features, and most of all, I liked the gray caption frame rather than the black caption frame. Download and activate the second plugin. There is no problem if you choose the first plugin.
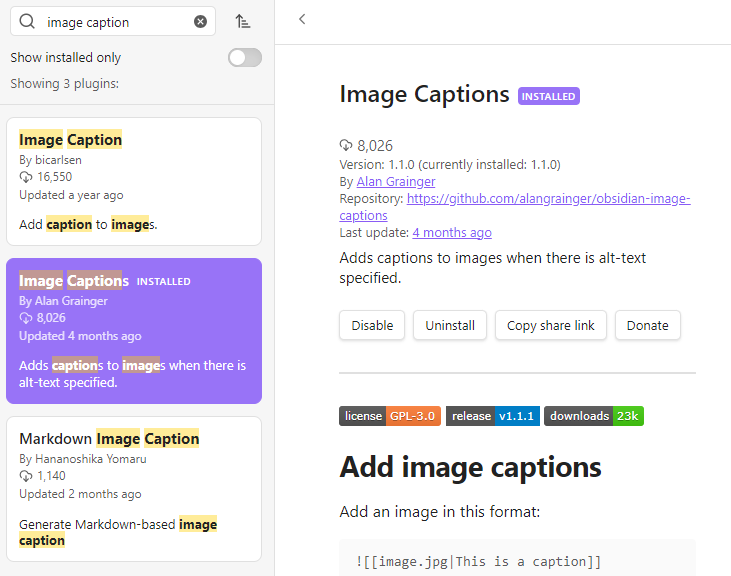 Obsidian - Community Plugins - Image Captions
If you separate the image blocks with OR characters and edit them in the order of file name, caption, and width of the image, you can see the lovely Pooh caption and resized image file as shown below.
1
![[myimage.png|Lovely Pooh|300]]
How about this? Do you like it?
 Obsidian image block with captions and resized images
